
Thanks for checking out our Lightroom presets for concert photographers! In this article, we'll cover everything you need to know to start using these presets to speed up your editing workflow and hone your images. If you're using our free preset pack and want to add additional color grading and color correction options, check out the Photographer Tonight Preset Pack Volume 1 here.
Let's jump in!
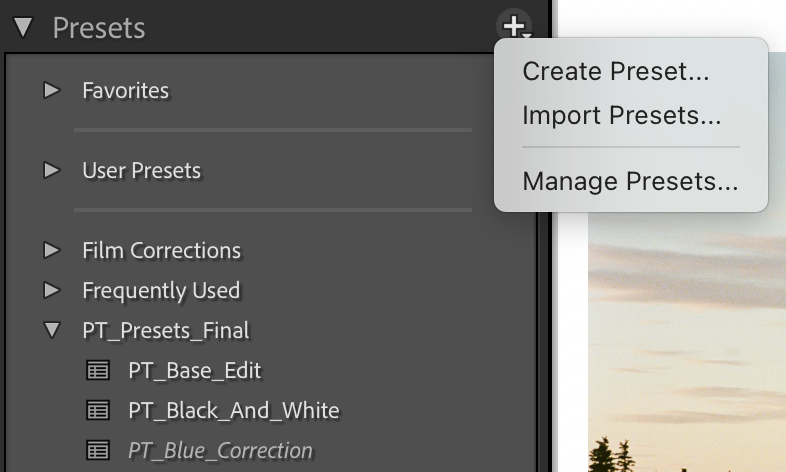
How To Install Your Lightroom Presets
To install your presets in Adobe Lightroom Classic, open the develop module, select the dropdown menu under the Presets section and click “Import Presets”
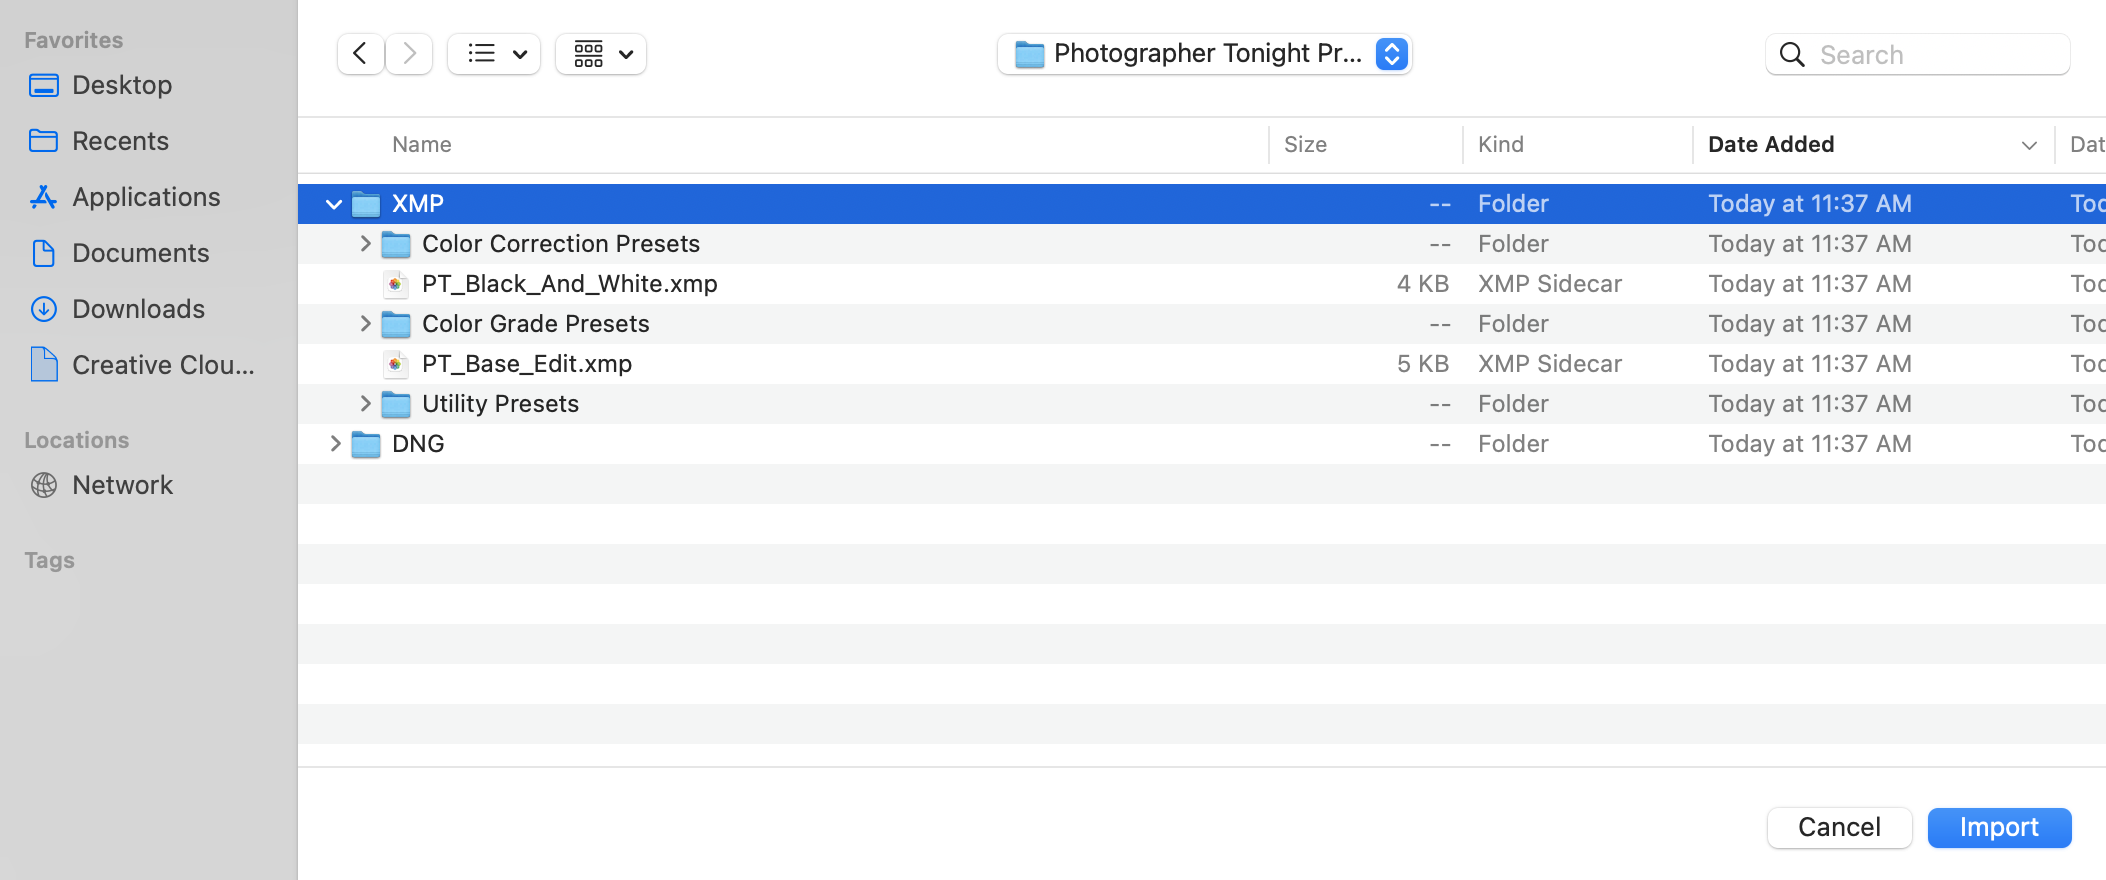
Select the XMP folder from your download and click “Import”. You can now find your presets in the Presets fly out menu.
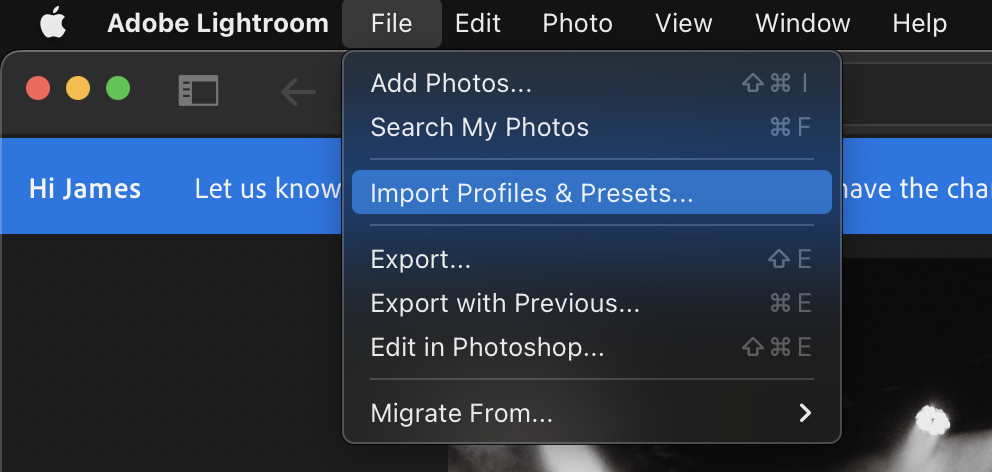
To install your presets in Adobe Lightroom CC, select “Import Profiles & Presets” under the “File” dropdown menu.
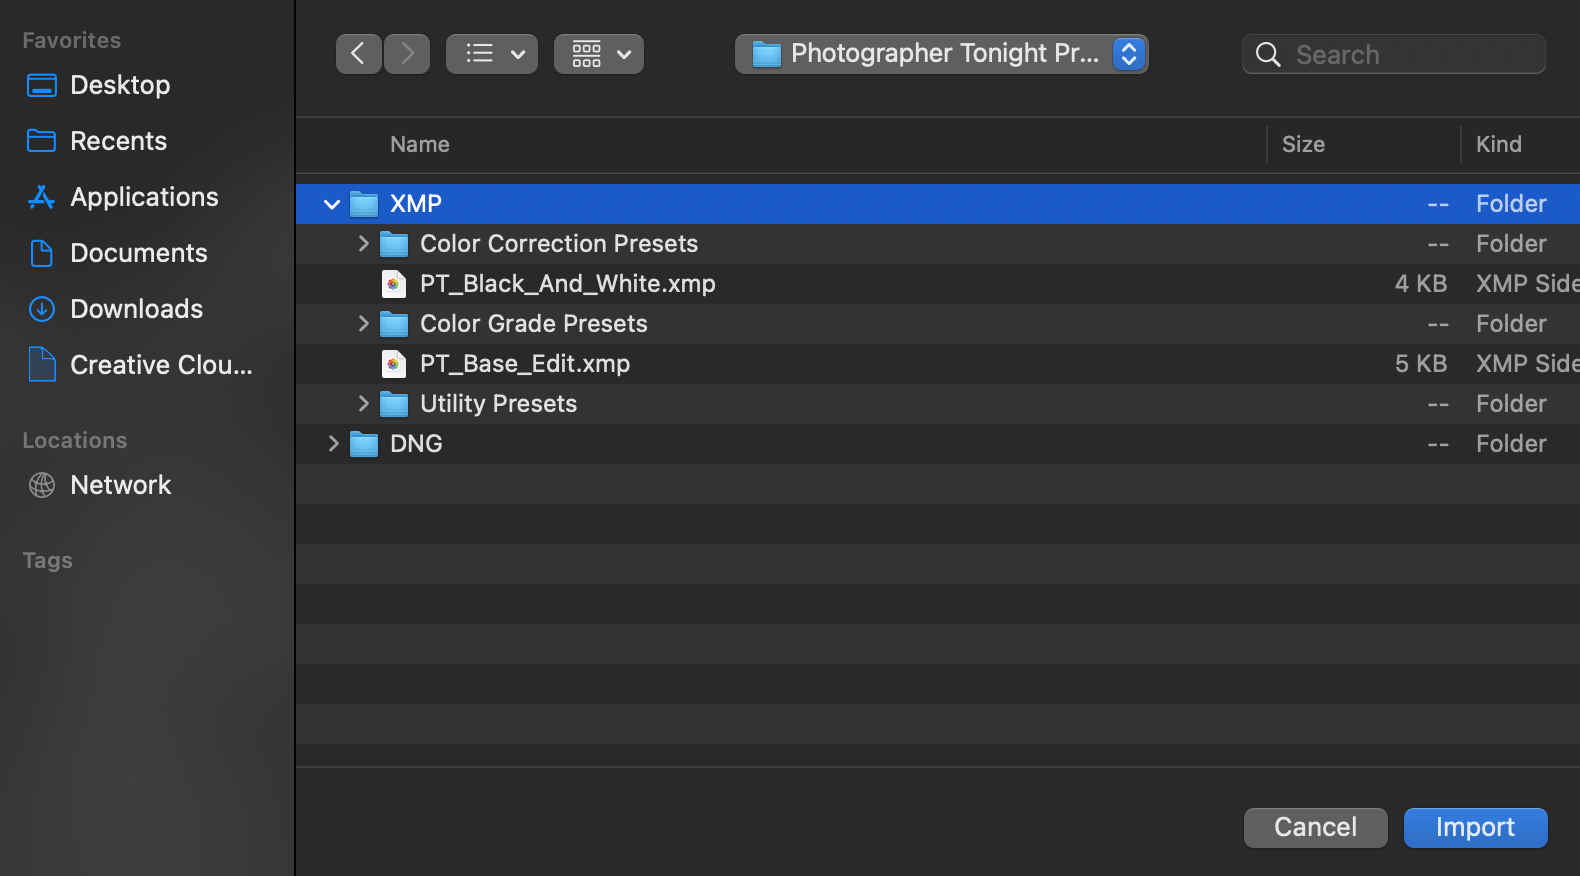
Select the XMP folder from your download and click “Import”. You can now find your presets under the “Presets / Yours” section of the develop module.
How To Use Your Lightroom Presets
- To get started, apply the PT_Base_Edit preset for color images or PT_Black_And_White for black and white images. This will add an overall edit to your image that handles things like shadow and highlight recovery, a universal tone curve, gentle noise reduction and sharpening, and contrast adjustments. Once the preset is applied, you may need to adjust your exposure since that is not affected by either base preset.
- Add a stackable color grade. These are the filters named PT_Cine, PT_Warm, etc. These color grades are designed to stack on top of your base edit to add specific looks to your image. They are setup to affect the colors and tones and will not change your exposure, contrast, or any other non-color settings. You can also stack these ontop of other custom presets you already have. These color grades span the entire color range from cool to warm. You may want to adjust your white balance after applying the color grades to dial in the colors.
- For images that need more intensive color corrections, apply the PT_Blue_Correction or PT_Purple_Correction presets. These are designed to remove heavy blue or purple color casts and restore more natural colors in your images. For best results, you may need to adjust your white balance after applying the preset. In testing, we found that the blue correction preset works really well once the temperature slider is moved further to the right.
- Finally, finish off your edit with the utility presets. Add increased sharpening with PT_Sharpen, ramp up noise reduction for challenging images with PT_Noise_Reduction, or add a retro atmosphere with PT_Dreamy.
And that’s it! You can find additional descriptions of the presets below. Feel free to contact us with any questions at photographertonight@gmail.com
Preset Descriptions
Base Edit Presets
- PT_Base Edit: A starting point for your color concert photos. Apply this preset first and then add the stackable color grades.
- PT_Black_And_White: A starting point for your black and white concert photos. Apply this preset first and then add any utility presets to round out your edit.
Color Grade Presets
- PT_Cine: A gentle color grade with cooler shaddows and a slight green hue to mimic a popular cinematic look.
- PT_Super Cine: A more intense version of PT_Cine with gentle teal/orange split toning added in.
- PT_Teal: Push cool blue tones in your image into teal for a standout look.
- PT_Teal_Orange: Applies an orange and teal color grade, made popular by Hollywood movies.
- PT_Cool: Lightly push the tones of your image toward the cool side of the color spectrum.
- PT_Cooler: A richer version of the PT_Cool filter that adds deeper blues into your image.
- PT_Coolest: The most intense cooling filter in this pack will send your images into a deep freeze.
- PT_Warm: Lightly push the tones of your image toward the warm side of the color spectrum.
- PT_Warmer: A richer version of the PT_Warm filter that adds more oranges and reds into your image.
- PT_Warmest: Set your images on fire with this intense warming filter. This one will adjust your white balance slightly, but the end result is hot enough to melt an ice cube.
Color Correction Presets
- PT_Blue_Correction: Remove tricky blue color casts and restore natural tones to your image.
- PT_Purple_Correction: Remove stubborn purple hues for a more balanced photo.
Utility Presets
- PT_Sharpen: Add additional sharpening to your images.
- PT_Noise_Reduction: Add additional noise reduction for especially tough shots.
- PT_Dreamy: Soften your image and add a misty ambiance.


.svg)
.svg)
